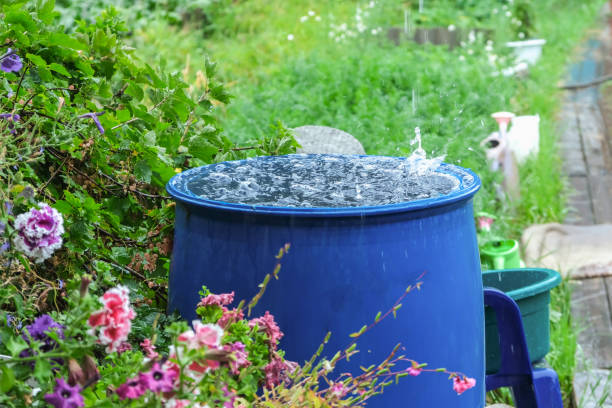
The Foundation of Sustainable Living: Understanding Rainwater Harvesting
Rainwater harvesting, the practice of collecting and storing rainwater for various uses, is an ancient technique experiencing a significant resurgence in modern sustainable living. Far more than just a bucket under a downspout, contemporary rainwater harvesting systems are sophisticated solutions designed to capture every drop, reducing reliance on municipal water supplies, mitigating stormwater runoff, and fostering greater self-sufficiency. This comprehensive guide delves into the ‘why’ and ‘how’ of rainwater harvesting, transforming a simple concept into a powerful tool for environmental stewardship and resource management.
The Why: Benefits Beyond Basic Water Conservation
The motivations behind adopting rainwater harvesting are manifold, encompassing environmental, economic, and social advantages. Environmentally, it significantly reduces the demand on stressed freshwater sources, lowers energy consumption associated with water treatment and pumping, and helps manage stormwater runoff, which often carries pollutants into natural waterways. Economically, homeowners and businesses can see substantial reductions in their water bills, especially in areas with high water rates or during drought periods. Socially, it promotes water independence, resilience against supply disruptions, and an increased awareness of water as a precious resource.
Historical Context and Modern Evolution
The concept of rainwater harvesting is not new; ancient civilizations across the globe, from the Roman Empire to indigenous communities in the American Southwest, developed intricate systems to capture and store rainfall. These early systems were crucial for agriculture and daily life in arid regions. Today, while the fundamental principle remains the same, technological advancements have introduced improved filtration, automated distribution, and more durable storage solutions. This evolution transforms a necessity of the past into a sophisticated, eco-conscious choice for the present and future.
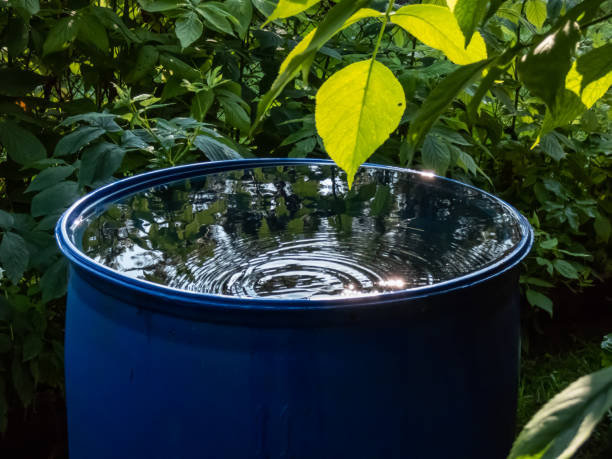
Essential Components of a Rainwater Harvesting System
A functional rainwater harvesting system is a carefully integrated network of components, each playing a vital role in collecting, filtering, storing, and distributing water efficiently and safely. Understanding these core elements is crucial for both design and successful installation.
Catchment Surface and Conveyance
The journey of rainwater begins on a catchment surface, typically a rooftop. The material of the roof (metal, tile, slate are ideal; asphalt shingles can be used but may impart more particulates) affects water quality. From the roof, water flows into gutters and downspouts, which act as the primary conveyance channels. Proper sizing and slope of these components are critical to efficiently channel water towards the storage unit without overflow or stagnation.
Pre-Filtration: Leaf Screens and First-Flush Diverters
Before water enters the storage tank, it undergoes initial filtration. Leaf screens or gutter guards prevent larger debris like leaves, twigs, and bird nests from entering the system. A crucial component for improving water quality, especially for non-potable indoor uses, is the first-flush diverter. This device automatically diverts the initial flow of rainwater, which typically contains the highest concentration of pollutants (dust, pollen, bird droppings accumulated on the roof), away from the storage tank. Once the initial “first flush” has passed, the clean water is then directed to the tank.
Filtration and Purification
Further filtration is often necessary depending on the intended use of the water. Mesh filters or finer sediment filters can remove smaller particles. For potable applications, advanced purification methods like UV sterilization, activated carbon filters, or even reverse osmosis may be employed to eliminate bacteria, viruses, and chemical contaminants. The level of filtration directly correlates with the water’s end-use.
Storage Tanks (Cisterns)
The heart of any rainwater harvesting system is the storage tank, or cistern. These come in various sizes, shapes, and materials, designed for above-ground or underground installation. Selecting the right tank involves considering capacity requirements, available space, aesthetic preferences, and budget. Proper tank installation includes a secure, level foundation and an overflow mechanism to handle excess water during heavy rainfall events.
Comparison of Storage Tank Materials
| Material | Pros | Cons | Typical Lifespan |
|---|---|---|---|
| Polyethylene (Plastic) | Lightweight, affordable, durable, UV-resistant, wide range of sizes. | Can be susceptible to algae growth if not opaque, less aesthetic. | 20-30 years |
| Fiberglass | Strong, lightweight, good chemical resistance, can be buried. | More expensive than plastic, can be brittle if improperly handled. | 30-50 years |
| Concrete | Very durable, excellent insulation, suitable for underground, aesthetic. | Heavy, requires professional installation, porous (needs sealing). | 50-100+ years |
| Galvanized Steel | Strong, fire-resistant, can be aesthetic (corrugated), good for large volumes. | Can rust over time, requires liners for potable water, heavy. | 20-40 years |
Pumps and Distribution System
For pressurized water delivery to various points of use (e.g., garden hoses, toilets, washing machines), a pump is essential. Pump selection depends on the required flow rate, pressure, and vertical lift. The distribution system consists of pipes, valves, and faucets, carefully routed to deliver the harvested water where it’s needed.
Designing Your Ideal Rainwater Collection System
Effective rainwater harvesting begins with meticulous planning and design. A well-designed system maximizes collection efficiency, meets water demand, and integrates seamlessly with your property. This phase requires careful consideration of several factors, from site assessment to calculating precise system capacities.
Step 1: Site Assessment and Permitting
Begin by evaluating your property. Identify suitable roof areas for collection, considering roof material, size, and potential shading. Assess potential locations for storage tanks, taking into account sunlight exposure (to minimize algae growth), proximity to points of use, and accessibility for maintenance. Crucially, research local regulations and permitting requirements. Many municipalities have specific codes regarding rainwater harvesting, especially for indoor use, and obtaining necessary permits beforehand is essential.
Step 2: Calculating Catchment Area and Annual Rainfall
The volume of water you can collect depends on your catchment surface area and local rainfall. Measure the footprint of your roof (length x width) to determine the square footage. Consult local meteorological data for average annual rainfall (in inches). The formula for potential collection is: Gallons = Catchment Area (sq ft) x Rainfall (inches) x 0.62
The 0.62 factor converts cubic feet to gallons and accounts for minor losses due to splash and evaporation. This calculation provides an estimate of the maximum water you could potentially harvest.
Step 3: Determining Water Demand
Next, quantify your water needs. Are you primarily watering a garden? Flushing toilets? Supplying a washing machine? Estimate the daily or weekly volume of water required for these specific uses. For example, a typical toilet flush uses 1.6 gallons, and a washing machine cycle can use 15-20 gallons. Comparing your potential collection with your demand will help determine the appropriate system size.
Step 4: Sizing Your Storage Tank
Based on your calculated potential collection and water demand, you can size your storage tank. Aim for a tank capacity that can meet your demand during dry spells, taking into account the frequency and intensity of rainfall events in your area. Consider a tank that can hold at least 2-4 weeks’ worth of your estimated demand, or potentially more if extended droughts are common. It’s often better to slightly oversize than undersize.
Step 5: System Layout and Component Selection
Plan the physical layout of your system. Map out the path from the roof to the tank, considering gutter and downspout routing, placement of first-flush diverters, and filter units. Determine pump requirements based on the distance and elevation water needs to be moved. Select appropriate pipe sizes and materials to minimize friction loss and ensure adequate flow. Integrate an overflow system to safely redirect excess water away from your foundation or into a rain garden.
Step-by-Step DIY Installation Guide
Installing a rainwater harvesting system can be a rewarding DIY project, offering hands-on experience in sustainable living. While the complexity varies, a basic system is well within the capabilities of a moderately skilled homeowner. Always prioritize safety and consult professionals for complex plumbing or electrical work.
Pre-Installation Checklist
- Review local regulations and secure all necessary permits.
- Gather all components: gutters, downspouts, leaf screens, first-flush diverter, filters, storage tank, pump (if needed), pipes, fittings, sealant, tools.
- Prepare a level, stable foundation for the storage tank.
- Ensure safe access to your roof and gutters.
Step-by-Step Procedure
-
Prepare the Catchment Area
Clean your roof and gutters thoroughly of any debris. Repair any damaged sections of the roof or gutters to ensure a clean and efficient collection surface. Install gutter guards or leaf screens if not already present.
-
Install or Modify Downspouts
Identify the downspouts that will feed your system. If necessary, cut the downspout to accommodate the first-flush diverter and the connection to the tank. Ensure proper slope for water flow.
-
Integrate the First-Flush Diverter and Filtration
Install the first-flush diverter according to the manufacturer’s instructions. This typically involves connecting it in-line with the downspout before the tank. Install any pre-tank filters (e.g., mesh filters) at this stage.
-
Position and Connect the Storage Tank
Place your storage tank on its prepared, level foundation. Connect the downspout/diverter outlet to the tank’s inlet. Ensure all connections are watertight using appropriate sealants and fittings. Install an overflow pipe at the top of the tank, directing excess water away from the foundation.
-
Install Pump and Distribution (Optional)
If your system requires a pump for pressurized delivery, install it near the tank, ensuring it’s protected from the elements. Connect the pump’s intake to the tank’s outlet and its discharge to your distribution piping. Route pipes to your points of use (e.g., garden hose bibs, indoor fixtures). Ensure all electrical connections for the pump are done by a qualified electrician and conform to local codes.
-
Final Inspection and Testing
Once all components are installed, perform a thorough inspection. Check all connections for leaks. Wait for the next rainfall event to test the system’s functionality. Observe water flow, ensure the first-flush diverter operates correctly, and check for any leaks in the tank or piping. Collect a sample of water for quality testing if intended for uses beyond basic irrigation.
Common Pitfalls to Avoid
- Improper Tank Foundation: A heavy tank on an uneven foundation can lead to structural failure or tipping.
- Leaky Connections: Use quality sealants and fittings, and double-check all connections.
- No Overflow Management: Without a proper overflow, heavy rains can flood areas around your tank, potentially damaging foundations.
- Inadequate Filtration: Insufficient pre-filtration leads to sediment buildup in the tank and clogged pumps/filters.
- Ignoring Regulations: Failing to obtain permits or adhere to local codes can result in fines or forced removal of the system.
Maintenance, Safety, and Legal Considerations
A rainwater harvesting system, like any home utility, requires regular maintenance to ensure optimal performance, water quality, and longevity. Beyond upkeep, understanding the safety implications and legal landscape is paramount for responsible ownership.
Routine Maintenance Schedule
- Monthly: Check gutter guards and leaf screens for blockages. Inspect first-flush diverters for proper operation.
- Quarterly: Inspect the tank for sediment buildup. If significant, drain and clean the tank (especially important for potable systems). Check all pipes and connections for leaks.
- Annually: Deep clean gutters and downspouts. Inspect the roof for any potential contaminants or damage. Service the pump (if applicable) according to manufacturer guidelines. Test water quality, particularly if using for sensitive applications.
- Post-Storm: After heavy rainfall, check the system for any new blockages or damage.
Water Quality and Safety
While rainwater is naturally soft and free of chlorine, it can pick up contaminants from the roof and air. For non-potable uses like irrigation, occasional sediment is usually not an issue. However, for uses like toilet flushing or laundry, and especially for drinking water, rigorous filtration and purification are essential. Always test water quality regularly. Prevent mosquito breeding by ensuring all tank openings are sealed or screened, and that there is no standing water around the system.
Legal and Health Regulations
Rainwater harvesting regulations vary significantly by location. Some areas encourage it, while others have strict rules, particularly concerning potable use. Key aspects to research include:
- Permitting: Many jurisdictions require permits for installing rainwater harvesting systems, especially if they are connected to indoor plumbing.
- Cross-Contamination Prevention: Strict codes often exist to prevent harvested water from mixing with the municipal potable water supply. This usually involves backflow prevention devices and clear labeling of non-potable lines.
- Water Rights: Historically, some regions had “right of capture” laws that restricted rainwater collection, but these are largely being repealed as water conservation becomes a priority. Always confirm current local water rights laws.
- Health Codes: For systems providing water for human consumption, health departments will have stringent requirements regarding filtration, disinfection, and regular testing.
Pro Tips for Maximizing Your Rainwater System’s Efficiency
Beyond the basics, several strategies and advanced considerations can elevate your rainwater harvesting system from functional to exceptional, ensuring you get the most out of every raindrop.
Expert Advice: Integrating with Smart Home Technology
Modern technology can significantly enhance your system’s efficiency and convenience. Consider integrating smart sensors that monitor tank levels, rainfall accumulation, and even water quality. These sensors can connect to a central hub or smartphone app, allowing you to track usage, anticipate needs, and receive alerts for maintenance or overflow conditions. Automated diverters can switch between multiple tanks or direct water to specific uses based on pre-set conditions, optimizing resource allocation without manual intervention.
Advanced Filtration and Purification
If you’re aiming for higher water quality, explore multi-stage filtration systems that include sediment filters, activated carbon filters for odor and chemical removal, and UV sterilizers for bacterial and viral disinfection. For regions with heavy industrial pollution or specific contaminants, specialized filters might be necessary. Consulting a water quality expert can help tailor the best purification strategy for your specific needs and intended water uses.
Optimizing for Specific Uses
Tailor your system to its primary purpose. For garden irrigation, focus on maximizing storage and easy access to hose bibs. For toilet flushing or laundry, prioritize reliable pumping and integration with existing plumbing, ensuring proper backflow prevention. If contemplating potable use, the investment in robust filtration and regular testing becomes non-negotiable, often requiring professional installation and certification.
Managing Overflow and Excess Water
Even with a large tank, heavy rains can lead to overflow. Instead of simply directing excess water to a storm drain, consider integrating it into your landscape. Rain gardens, permeable pavers, or swales can absorb and filter overflow, recharging groundwater and preventing localized flooding. This turns a potential problem into another opportunity for sustainable water management.
Connecting Multiple Tanks
If your water demand exceeds the capacity of a single tank or if space is limited for one large tank, consider connecting multiple smaller tanks in series or parallel. This allows for flexible expansion and can distribute the weight more evenly across your property. Ensure proper equalization pipes are installed to allow water levels to balance across all connected tanks.
Frequently Asked Questions (FAQ)
- Is rainwater safe to drink?
- Raw rainwater is generally not safe to drink without proper treatment. While it’s naturally soft and free of chlorine, it can collect airborne pollutants, bacteria, viruses, and debris from your roof. For potable use, it requires a multi-stage filtration system, including sediment filters, activated carbon, and UV sterilization, along with regular water quality testing.
- How much water can I realistically collect from my roof?
- The amount depends on your roof’s catchment area and the average rainfall in your region. A common rule of thumb is that 1 inch of rain on a 1,000 square foot roof yields approximately 623 gallons of water. You can calculate your potential collection using the formula: Catchment Area (sq ft) x Rainfall (inches) x 0.62.
- What are the main uses for harvested rainwater?
- The most common uses for harvested rainwater are non-potable: irrigation for gardens and landscapes, flushing toilets, washing clothes, and washing cars. With appropriate filtration and purification, it can also be used for showering and even drinking, though this requires more stringent system design and maintenance.
- Do I need a permit to install a rainwater harvesting system?
- Permit requirements vary significantly by local municipality, state, and even country. Some areas encourage rainwater harvesting with incentives, while others have strict building codes and health regulations, especially for systems connected to indoor plumbing or intended for potable use. Always check with your local planning or building department before starting installation.
- How often do I need to clean my rainwater tank?
- The frequency of tank cleaning depends on your system’s design (especially pre-filtration), the cleanliness of your roof, and the intended use of the water. For non-potable outdoor use, an annual inspection and cleaning might suffice. For indoor or potable uses, more frequent checks (quarterly) and thorough cleaning are recommended to prevent sediment buildup and maintain water quality.

Related Posts